Check your site for unused CSS
How to Remove UnusedCSS In Wordpress
This article will provide a detailed walkthrough on removing unused CSS from your WordPress site.
Briefly, the process will follow these steps:
- Analyze CSS files of a sample site using Browser Developer Tools
- Run PageSpeed Insights on the sample site
- Scan the site with UnusedCSS
- Download minified CSS files from UnusedCSS and upload them to the WordPress server
- Rescan the CSS with Browser Tools and PageSpeed Insights
We have set up a WordPress website with a basic view and a number of WordPress plugins. When WordPress Plugins and Themes are added to the site, they generally bring with them a good amount of CSS but use a small section of them. This leads to unoptimized style code and slows down the load time of the site, leading to compromised UX. This article talks about removing that unused CSS.
When we open our site in the browser, the Network Tab of Inspection Tools shows the following size and load-time stats for the CSS files.

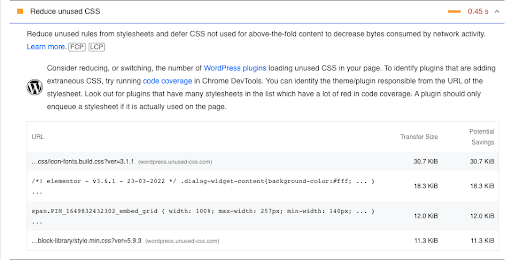
Running PageSpeed Insights on it, we observe the “Reduce Unused CSS Warning” letting us know that we have a potential of up to saving 0.45 seconds. The number would be higher on slow connections and low-end devices.
 Before moving further from this point, it is a must to disable any caching plugins your site may be using e.g. WP Rocket or WP Super Cache. This is because these plugins often merge CSS files together and give them a different name, which makes it very difficult to replace the original files with the cleaned versions. The example site does not have any caching plugins installed.
Scanning with UnusedCSS
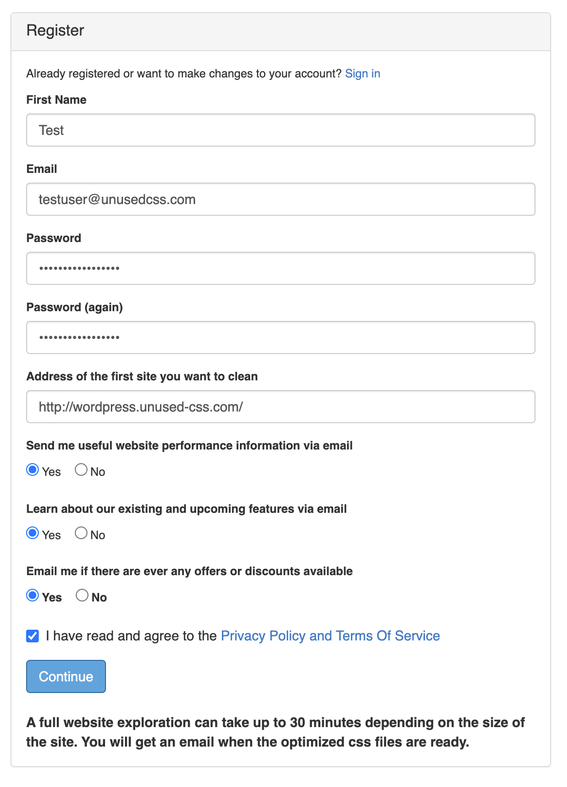
It’s time to get our CSS files scanned by Unused CSS. Let’s head to its signup page and create an account. We will enter our required details and register.
We add our site to the main dashboard and initiate the scan.

The scan takes some time to complete. Once the results are ready, we get an email. Once the scan is complete, our site entry looks like this:

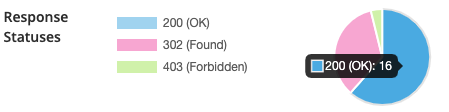
Before we go through the cleaned CSS files, we can click on the little pie chart of response codes to make sure that all the pages of the site were scanned.
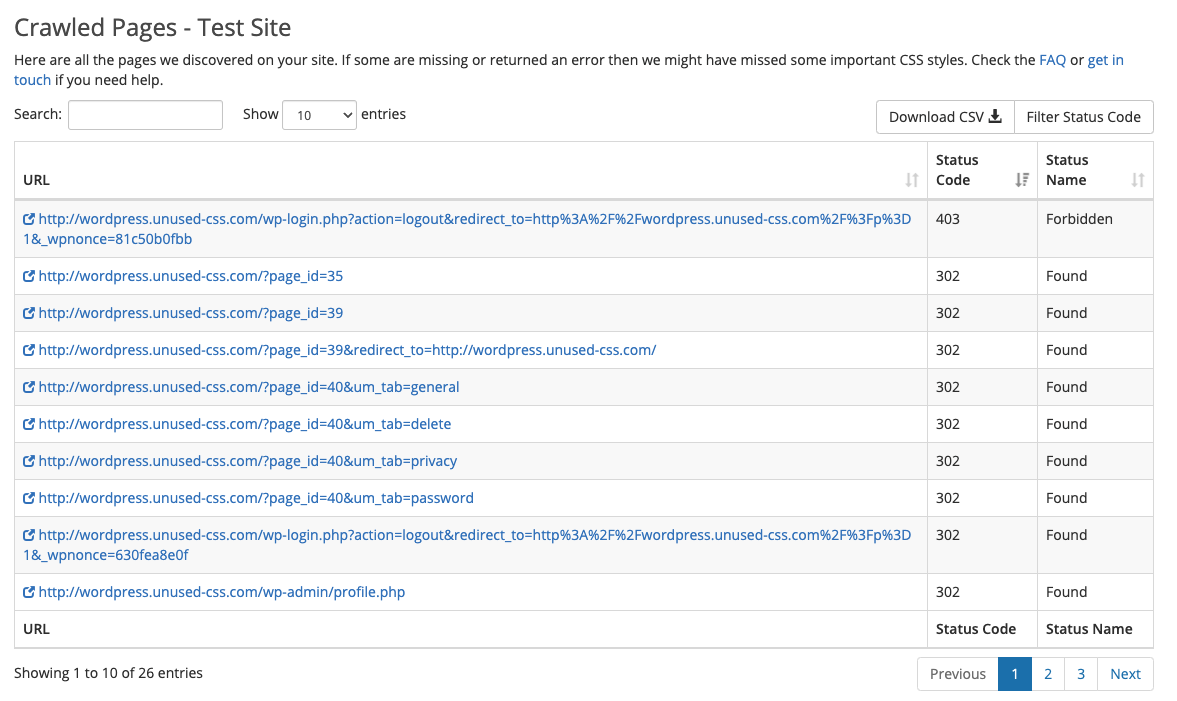
If any pages are missing because they couldn't be crawled by clicking links, then they can be added to the site settings under "Additional Start URLs" before the scan to make sure any CSS rules get marked as used. This section is available once you press “show” in “Advanced options”.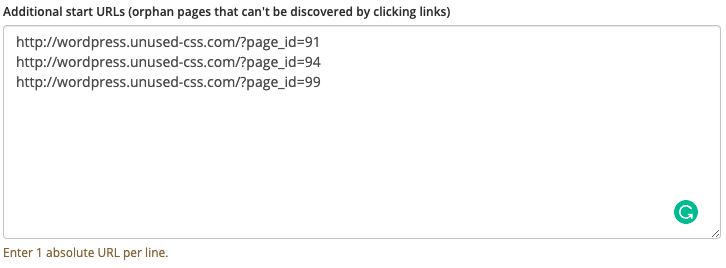
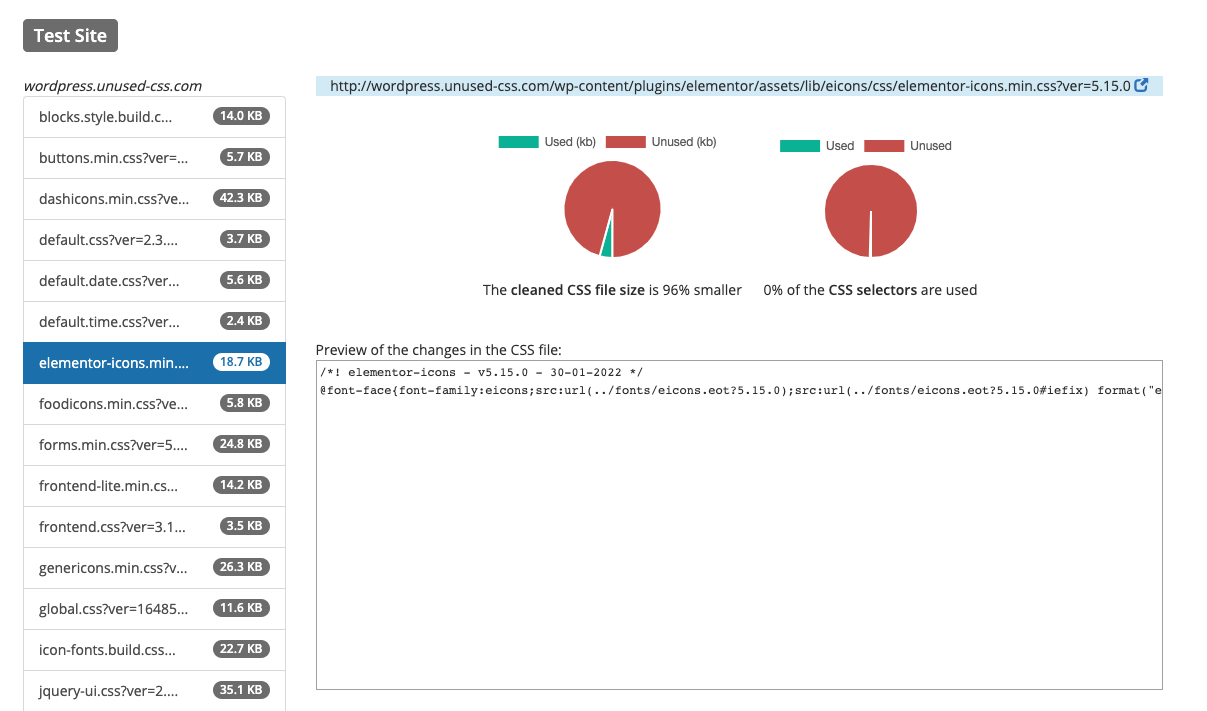
Once the scan is complete, we can click on "CSS Files" to see the details of the scan of each file.
On the details page, we can see how much of the CSS in each file is unused. The text highlighted in dull blue color is the file path on the WordPress server. We will use this address to locate files on our server when replacing them with cleaned versions.
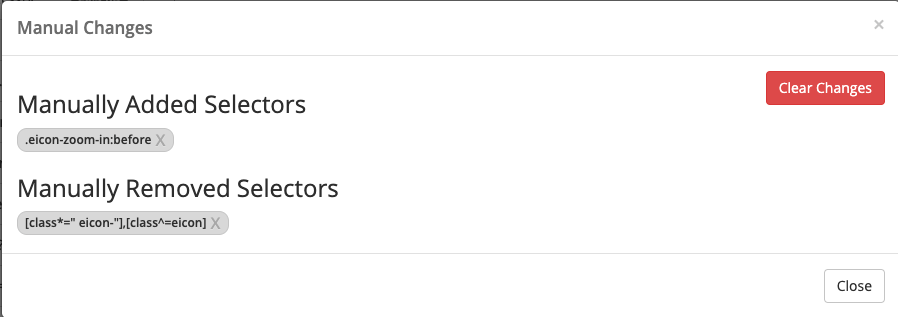
The same page offers a ‘Download the CSS’ option below. This lets us download the cleaned file to replace the uncleaned one with on the server. Before downloading, we can select any of the unused style blocks that we may want to keep. The ‘Show Changes’ button on the top-right of the section shows a count of the manual changes. When clicked, it shows the names of manually added/removed selectors. Note that the selectors that are being removed in the scan are shown in red color while the ones kept or manually added back in are color black.
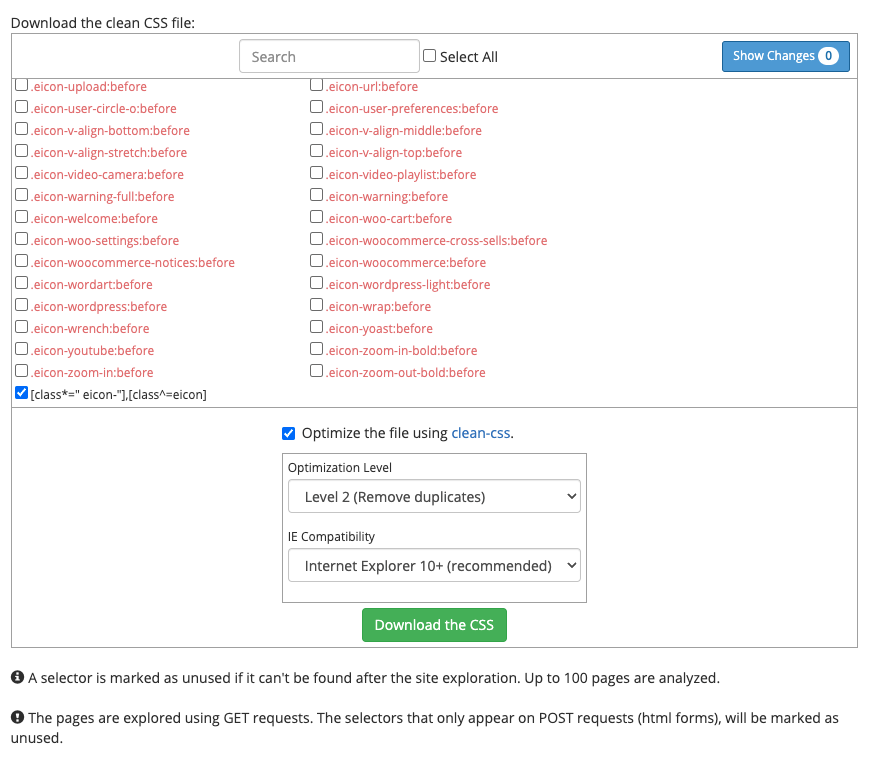
If you do need to make any manual changes to the CSS file here, then we will remember the changes for the next scan. You can see all the manual changes that you have added by clicking the “Show Changes” button.
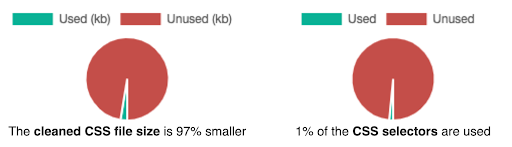
Scan results show that our CSS load performance is highly redundant. We observe that there are files with even 0% and 1% of used selectors.
Let’s download the improved version of files with maximum savings potential and upload it to our WordPress server. To keep a copy of the old file, we suffix it with _backup and upload the new one with the original name, thereby overwriting the old files with their smaller versions. Note that only paying users can download the cleaned CSS files.
To edit the filenames and upload the new file on the server, we need an FTP Client - any software that can communicate with our server using File Transfer Protocol. In this example, we will use FileZilla.
Let’s take a look at what FileZilla’s interface looks like at launch time. The top section includes fields that take input the connection details of the server. We need the hostname, authorized username and its password, and port number (which is by default 22 for SFTP) to connect.
The right window in the next section labeled as “Remote Site” is of our most interest. Once we are connected, all the directories and files on the server will be displayed here in a tree-like structure. We can then choose to rename those files and upload new ones.
Let’s connect to our FTP server.

We are in. The Remote Site section shows the main directory of our server i.e WordPress.
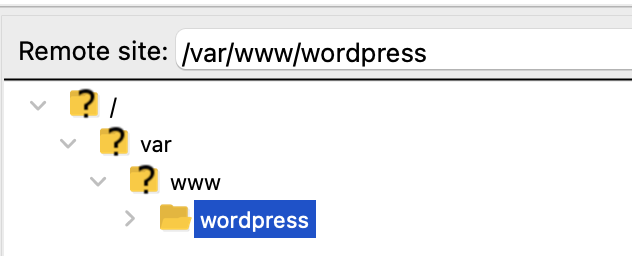
As we observed before, the “CSS Files” page of our site’s scan displayed the file path. We will use the same path to locate files on the WP server. For instance, here is the address of one file.
“http://wordpress.unused-css.com/wp-content/plugins/wp-recipe-maker/dist/public-modern.css?ver=8.1.1”
As we observed before, such file paths are mentioned on the details page of each file's scan.
![]()
You can ignore the question mark sign and the content after it. The address tells us that the target file public-modern.css has the following folder ancestry
wp-content > plugins > wp-recipe-maker > dist
Files in a folder are displayed in the “Filename” section below the Remote Site section. When we follow the above path on our FTP Client’s Remote Site section, we reach the file. Note that FileZilla doesn’t expand a directory by default. It shows a question mark icon with a folder for all the folders that are not yet expanded. Once you click on the folder name, FileZilla fetches details of children from the server. This operation can take a few moments depending on the speed of your internet connection.
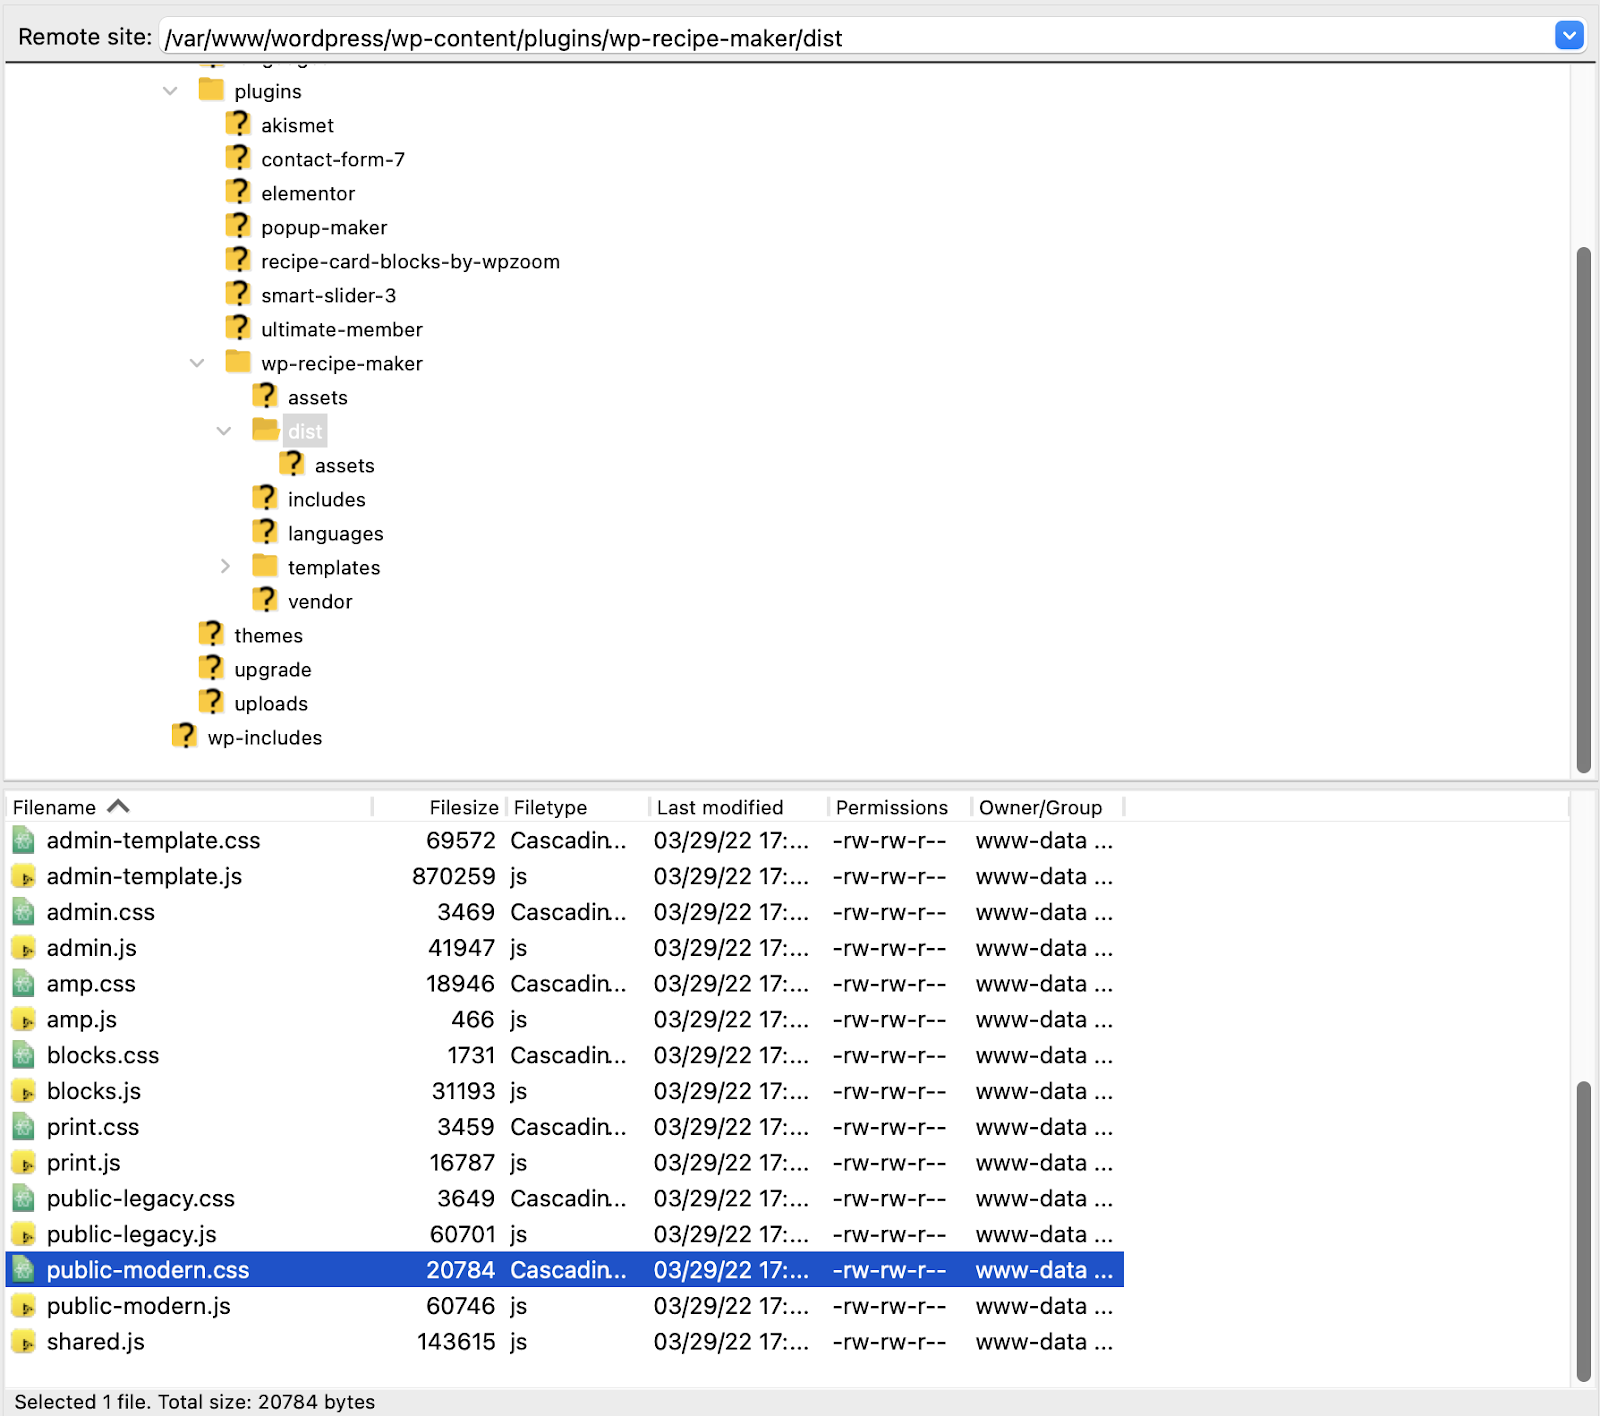
Now we can right-click on the file and rename it.
The left half of FileZilla’s interfaces lets us navigate through our computer’s local filesystem. We will select the cleaned file to drag and drop it into the remote directory. We will repeat this process for all the files we choose to overwrite. We don’t need to overwrite all the files. Choosing the ones with large sizes that have a high percentage of unused CSS will suffice.
Once you have finished uploading cleaned CSS files, you can re-enable your site’s caching plugins, if any.
On loading the site with improved files, we can see a drastic decline in file sizes in the Network Tab.
 Let’s run PageSpeed Insights again. Here is what we observe:
 We observe that our time-savings potential is down to 0.15s from 0.45s - credits to the removal of unused CSS. You may wonder why we still see this warning in PageSpeed results. The answer to that is PageSpeed Insights will show code that is unused by a single page. If some CSS rules are used by a different page, then it will still incorrectly highlight them as being unused. It also doesn't scan JavaScript files for CSS classes that might later be added to the page. For these reasons, we don't need to aim for 100% removal of unused code on PageSpeed Insights, but we can see that the score has been improved regardless. What we should be aiming for instead, is removing all the code that is actually unused by the whole site.
Note that when you next upgrade or change the theme/plugins that these files are for, these files will get upgraded with it. This is good because you will want the new version of the file. If the file needs cleaning again, you will need to run another scan. Some of our packages have the option of scheduled scans which will help automate this
Conclusion
Unused CSS can increase the load time of a site and hence hamper the user experience. To get rid of unused CSS, you can use UnusedCSS optimizer and improve your site’s user experience.
UnusedCSS helps website owners remove their unused CSS every day. See how much you could save on your website: